skip to main |
skip to sidebar
This Halloween I wanted to make up a special treat for my nephew and niece and their friends when they embarked on this special night of tricking and treating!
These Pumpkin Whoopie Pies are decadently delicious and can be enjoyed all throughout the Autumnal season, not just on Halloween!
A whoopie pie is a baked good made of two round chocolate, cake-like, cookies with a sweet, creamy frosting sandwiched between them. While considered a New England phenomenon and a Pennsylvania Amish tradition, they are increasingly sold throughout the United States. According to food historians, Amish women would bake these and put them in farmers' lunchboxes. When the farmers would find these treats in their lunch, they would shout "Whoopie!" You can get this simple recipe here: Pumpkin Whoopie Pies
The recipe is actually for a "Mini" version, but I made a larger, more regular sized version by using 2 Tablespoons of batter for each cookie instead of 2 teaspoons. The baking times remain the same. I also doubled the batch of filling. First step is to get your oven preheating to 375° and then sift the flour, cocoa, baking soda and salt together in a bowl.
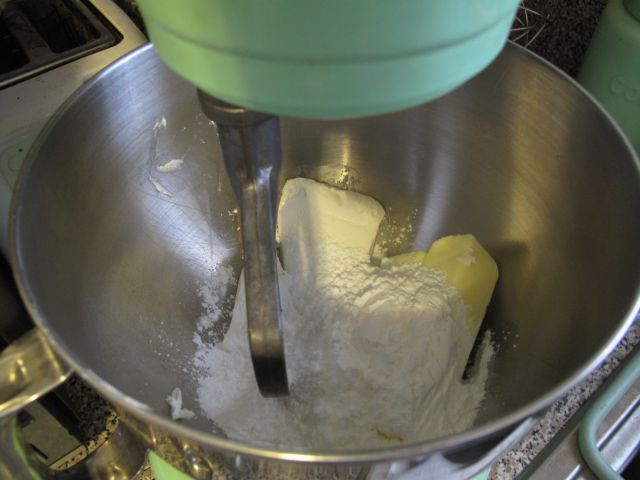
 In the bowl of an electric mixer fitted with the paddle attachment, cream together butter, shortening, granulated sugar & dark brown sugar until smooth. Then you'll add one egg and continue to mix until pale and fluffy.
 Mix in about half of the flour mixture, then a cup of milk, some pure vanilla extract and then the remaining flour mixture.
 Drop batter, 2" apart, onto baking sheets lined with parchment or non-stick baking mats. Bake for 12-14 minutes, rotating the sheet pans halfway through baking, until the cookies are done.
 Transfer the cookies to cooling racks and cool completely.

To prepare the luscious pumpkin filling, in the bowl of an electric mixer, fitted with paddle attachment, whip together cream cheese, unsalted butter and confectioners' sugar, on medium speed, until smooth.
 Add fresh pure pumpkin, a little cinnamon and nutmeg and continue to whip until smooth, scraping down the bowl as necessary.
 Pipe or spoon the filling on the flat sides of half the cookies. Sandwich with the remaining cookies, flat side down. Enjoy one of these now because there won't be any of them left soon after you make them!!

Another comforting dish to enjoy during chilly weather season is hearty Beef Stroganoff.
Beef Stroganoff is a Russian dish of sauteed pieces of beef served in a sour cream based sauce over egg noodles or rice. Originating in 19th century Russia, it has become popular throughout many parts of the world in some variation or another.
This recipe utilizes a slow cooker, which is my preferred method. You start out by browning, in 1 tablespoon of vegetable oil, 1-1/2 lbs of beef cut into small chunks. You can use lean beef stew meat, rib-eye, even prime rib if you like. Set the meat aside.
 In a 3-1/2 qt or larger slow cooker place 2 cups of sliced mushrooms, 1/2 cup chopped onion, 2 cloves garlic minced, 1/2 teas. dried oregano, 1/4 teas. coarse salt, 1/4 teas. dried thyme, crushed, 1/4 teas. freshly ground black pepper, 1 bay leaf
.
Add the browned meat, 1-1/2 cups of beef or chicken stock & 1/3 cup dry sherry. Cover and cook on low for 8 hours or high for 4 hours. Discard the bay leaf after cooking. As seen here, I've lined my slow cooker with a Reynolds Slow Cooker Liner. No messy clean-up afterwards! After the initial cooking time, mix together 1 cup of sour cream, 1/3 cup of all-purpose flour and 1/4 cup of water until smooth. Into this sour cream mixture stir in 1 cup of the cooking liquid from the slow cooker until combined.
  Return this sour cream mixture to the slow cooker, cover and cook on high for an additional 30 minutes or until thickened and bubbly.
 Serve over hot cooked egg noodles (or rice). Delicious & filling!

Autumn is in full swing and the types of meals during this time of the year are comforting and hearty "one-pot" meals like Chicken & Dumplings! Chicken and Dumplings is a popular comfort food dish commonly found in the Southern and Midwestern United States that is also attributed to being a French Canadian dish that originated during The Great Depression. A dumpling, in this context, is a mixture of either flour, shortening, and water or milk, or flour and stock which is then formed into a ball or rolled out flat.
Chicken and dumplings as a dish is served with a combination of boiled chicken meat, the broth produced by boiling the chicken with vegetables, multiple dumplings, and salt & pepper for seasoning.
There are probably as many chicken and dumpling recipes out there than anything! This recipe comes from Lucinda Scala-Quinn and her latest cookbook, Mad Hungry: Feeding Men & Boys. You can also find the recipe here: Chicken & Dumplings.
I love how this recipe also utilizes 2 very delicious but under-used vegetable, turnips and parsnips.
This particular recipe is actually quite simple to put together and is ready in about an hour. In a large dutch oven, place the whole chicken, onion, carrot, celery, turnip, parsnip and parsley sprigs. Cover with water, bring to a boil, then simmer for about 50 minutes.
 Lift out the chicken and vegetables, discard the onion and parsley. Continue to simmer the broth for 15 to 20 minutes to allow the chicken to cool slightly. When the chicken is cool enough to handle, remove the meat from the bones and shred the meat into large chunks. Preferably, I like to use just the white meat here and save the dark meat for chicken salad, but you can use the meat as you like in this dish.
 Next, prepare the dumplings. A few simple ingredients, flour, baking powder, salt, milk & a little dill mixed together until combined.
 Drop the dumpling dough, by the tablespoon, into the simmering broth, cover and cook until the dumplings have cooked through, about 3-4 minutes. Carefully add the shredded chicken meat and vegetables back to the pot and simmer for one minute to heat through.
 Serve generous portions of this in large bowls and enjoy this warm and comforting meal when the weather is a bit nippy out!

Mario's Weekend Cooking Challenge is a Facebook group for people to get together, once a month, and prepare the same recipe, compare notes and discuss outcomes. It is put together by Mario Bosquez host of "Living Today" on Martha Stewart Living Radio Sirius 112 & XM 157. This month's challenge is the "Ultimate Chocolate Chip Cookie"! Just in time for Halloween, the Ultimate Chocolate Chip Cookie is a salty yet sweet cookie and is the perfect treat for family and friends on this special haunted night. This recipe, originally from David Leite, also takes some of its inspiration from Chef Jacques Torres. Something unique about this recipe is that it utilizes both cake flour & bread flour, and a light sprinkling of sea salt is applied to the tops of each cookie before baking. Using a mixer fitted with paddle attachment, cream butter and sugars together until very light, about 5 minutes. Add eggs, one at a time, mixing well after each addition. Stir in the vanilla. Reduce speed to low, add dry ingredients and mix until just combined, 5 to 10 seconds
 Add your chocolate to the dough, stirring lightly just to incorporate into the dough without breaking up the chocolate.
Place a sheet of plastic wrap on top of the dough and refrigerate the cookie dough for 24 to 36 hours and up to 72 hours. WARNING: This raw cookie dough is very addictive as is, so try to contain yourself! It is also not advised to eat raw cookie dough containing eggs.
 When ready to bake, preheat oven to 350 degrees. Line a baking sheet with parchment paper or a nonstick baking mat. Scoop six 3 1/2-ounce mounds of dough (the size of generous golf balls) onto baking sheet. Sprinkle very lightly with sea salt. I suggest using Maldon flaked sea salt. It's more attractive looking on the finished cookie!
 Cool the cookies, on the sheet pan, on a rack, for 10 minutes, remove cookies directly to cooling racks to cool completely, and enjoy this little bit of chocolate bliss!

 In the bowl of an electric mixer fitted with the paddle attachment, cream together butter, shortening, granulated sugar & dark brown sugar until smooth. Then you'll add one egg and continue to mix until pale and fluffy.
 Mix in about half of the flour mixture, then a cup of milk, some pure vanilla extract and then the remaining flour mixture.
 Drop batter, 2" apart, onto baking sheets lined with parchment or non-stick baking mats. Bake for 12-14 minutes, rotating the sheet pans halfway through baking, until the cookies are done.
 Transfer the cookies to cooling racks and cool completely.
 Add fresh pure pumpkin, a little cinnamon and nutmeg and continue to whip until smooth, scraping down the bowl as necessary.
 Pipe or spoon the filling on the flat sides of half the cookies. Sandwich with the remaining cookies, flat side down. Enjoy one of these now because there won't be any of them left soon after you make them!!


