Every year, I'm inspired by the abundance of beautiful red tomatoes at the farmer's market. They seem to be begging to be enjoyed in endless ways.
Canning is an old tradition, one that many cooks still enjoy. I find that it is an incredibly satisfying household chore--a true labor of love--one that takes some time and energy, but is well worth the effort. Imagine having the taste of summer tomatoes all year round! Your family, friends, and guests will be impressed, I promise you that.
Growing up in a Sicilian family, my grandparents grew and canned their own tomatoes each year. They are responsible for teaching me this rewarding process!
How to Select Tomatoes: The importance of Quality
Roma plum tomatoes are ideal for canning. They should be very red, meaty, virtually seedless, long and show no yellow discoloration.


Basic Tips: Jars and Lids
Never use lids twice. Used lids can cause air to escape, which will result in spoilage. Purchase them new every year.
Rims that have been damaged or bent, or are rusted cannot be reused.
Jars can be reused year after year. Make sure you wash, rinse, and dry them thoroughly before canning.
Basic Tips: Canning Tomatoes
Always use a wooden spoon--not a metal one--to pack the tomatoes into jars. Metal can rust, and can give off a metallic taste.
Each tomato should be carefully inspected, it only takes one tomato spoil and entire bunch.
Always clean the processing machine (if using one) thoroughly after each use. It should be completely disassembled and each part washed and dried to prevent any dirt, dust, rust, or bacteria from getting into the tomatoes.
Ingredients:
25 lbs of Roma/Plum tomatoes
Coarse Salt
30 fresh basil leaves, washed and dried
I grow my own Genovese Basil every year! I love the intensely scented, sweet, extra large leaves!

Equipment:
Sharp paring knife
2 large bowls
Large slotted spoon, extra large wooden spoons, and rubber spatulas
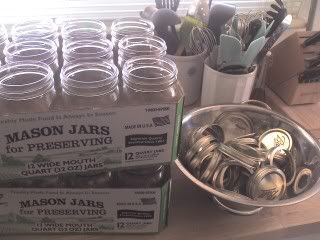
12 quart sized Mason jars, washed, rinsed and dried
12 new lids for the Mason jars, along with the rings
wide-mouth canning funnel & jar tongs (available where you buy the jars & lids)
Pre-washed and well rinsed all cotton dish-towels.
Large enamel canning pots with racks (Martha Stewart Everyday at Kmart)

Large stainless steel pot for making tomato puree
Large steel colander
Tomato processor, manual or electric. I have a manual one, but I think I'm going to buy the optional motor that can be attached to it! If you do a ton of tomato puree, like I do, this is a must have and a very inexpensive item. I got mine at a local hardware store for about $40, and my model included atttachments for processing tomatoes, berries, pumpkin/squash & grapes You can get more info from Weston Supply.

Outdoor propane gas burner (I use a Martha Stewart Everyday Turkey Fryer from Kmart-no longer available, but Turkey fryers are inexpensive and easy to come by ). I use the outdoor burner because it gets hotter and can bring the large canning pot of water to a boil faster. Of course, a kitchen stove works just fine.

Decide where you want to can the tomatoes. When canning a small amount, you can do them right in your kitchen. When the weather is nice, I like to do most of the work outside, especially the boiling of the filled jars, as it can heat up the kitchen!
Cut each tomato in half and place the halves in a large bowl.

After cutting all the tomatoes, start loading the hopper of the tomato processor. The processor works almost like a manual meat grinder, but has 2 outlets. One releases the pure tomato pulp and the other releases the separated skins and seeds.

If you don't have a tomato processor or can't find one, you will have to use a Food Mill. This will take a bit more time, but works just fine.
I also like to pass the pulp through a food mill as well, but this is totally optional.

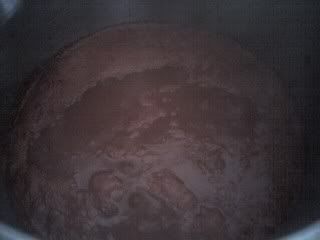
I place all the tomato pulp into a large stock pot with about 2 tablespoons of coarse salt per 8 quarts of pulp.
Bring to a boil and cook until you see the tomatoes bubbling; they will be foamy and frothy. Stirring occassionally, boil the tomatoes for about 20 minutes. Remove from heat.
Line a large colander with a large cotton cloth, letting the cloth hang over the rim of the colander. Set the colander over a large bowl. I just place the colander right in the sink.
Ladle the cooked tomatoes into the colander and cover with the excess cloth hanging over the sides.
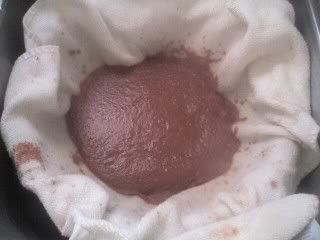
Once the tomatoes have drained and cooled, you can squeeze more water out with your hands. The more you drain the tomatoes, the thicker, redder and richer the tomatoes will be (just like tomato paste).
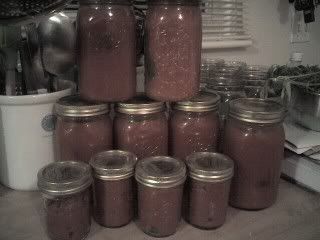
Ladle the puree into prewashed and sterlized jars using a wide-mouth canning funnel. Add a few basil leaves. Wipe the rims of the jars clean and place lids on top. Screw on the bands.
NOTE: The USDA recommends adding 2 tablespoons of lemon juice to quart jars/1 tablespoon to pint jars before filling. This is to ensure a safe acidity level. My grandmother never did this and we never had a problem, therefore, I consider this optional.

Place the jars in the large canning pot and fill with water to about 2-3 inches above the jars. Bring the water to a boil and then continue to boil the jars for 45 minutes for quart jars; 30 minutes for the pint jars (if using)

After the processing time is up remove the jars from the water using a jar lifter and place them on a towel lined counter top or table and let them cool at least 24 hours. While they are cooling, you may hear a "popping" sound. This is a good thing. It means the lids are sealing correctly. When the jars are cool, push on the center of the lid. It should not move at all. If it pops back, the jar is not sealed and should be refrigerated and used within 2 weeks. Sealed jars can be stored in a cool, dark place for up to 2 years.
Click here For More Information on Canning & Preserving.

WOW, John! I am so impressed that you can. It all looks so wonderful and I learned some really great tips. Maybe I will try to can this year.
ReplyDelete