Showing posts with label Cheese. Show all posts

Saturday, July 14, 2012

Savory Chicken Hand Pies

  If you're always finding yourself with an abundance of leftovers from a previous nights meal, here's a fun and tasty idea to use up leftover chicken.  This delicious "portable" version of a chicken pot pie, similar to a pasty, is very simple to make and also versatile.  They freeze very well, either baked or unbaked, so make up several of them, and have them on hand for a tasty snack or a quick meal.  Turkey or ground beef can also be used, and experiment with different veggie combos, or make an all veggie one!

  You want to start by making the filling first, because it needs to chill, in the refrigerator, before making the actual pies.  

For the filling, you'll need:

1 heaping cup of cooked shredded chicken meat (this can be leftovers or from a store-bought rotissiere chicken)

2 Tbs unsalted butter

½ cup chopped onion
1/3 cup chopped celery
1/3 cup chopped carrot
½ teas coarse salt
2 Tbs all-purpose flour
1½ cups chicken broth (low-sodium store bought or homemade)
¼ cup grated Parmesan cheese  


   To make the filling, melt the butter in a 10" skillet, on medium heat.  Add the onion, celery, and carrot and saute for 3 minutes.  Stir in the salt and flour and cook for 1 minute more.


   Add the chicken broth and stir until it thickens, about 2-5 minutes.

  
  Stir in the chicken and the Parmesan cheese.  Cool and chill the filling in the refrigerator.


  Now make the pastry dough.  For the novice baker, this has been deemed the most forgiving dough to work with.  Easily rolls out and doesn't tear.  The cream cheese allows this dough some elasticity and the results are tender and flaky.
  If you don't have a food processor, this can all be done by hand.

1 stick unsalted butter, room temperature
4 oz cream cheese, room temperature
¼ cup heavy cream
1½ cups all-purpose flour
½ teas coarse salt

  In a food processor, process the butter, cream cheese, and cream until smooth.
  Add the flour and salt.  Process just until combined and the dough holds together in a ball.


    Turn the dough out onto a well-floured surface.  Divide into 2 equal pieces.  Flatten into disks and wrap each in plastic wrap.  Chill in the refrigerator for at least 30 minutes before rolling out.  Can also chill the dough overnight, but be sure to take the dough out of the refrigerator 15 minutes before rolling out.


  Preheat the oven to 375° Fahrenheit.  Butter or line a rimmed baking sheet with parchment paper or a Silpat liner.

  Working with one dough disk at a time, roll dough out onto a floured surface to about 1/8" thick.  Using a 5" round cutter or an overturned bowl (about 5" in diameter) cut out circles, 3 at a time.  Re-roll dough scraps and cut out more circles.  You should have a total of 10 circles, 5 from each piece of dough.

 
Place ¼ cup of the chilled filling on one side of a dough circle.  Wet the edges of the dough with a little water.  Fold the dough over to form a half circle.  Pinch the edges closed and crimp with a fork.  Repeat this with the remaining dough circles.  At this point, the hand pies can be frozen.

   
  Place the hand pies on the prepared baking sheets and chill for about 15 minutes.  Prick each hand pie on top, twice, with a fork.  Whisk together 1 large egg with 1 Tbs water.  Brush this egg wash over each hand pie.  Bake for 25 minutes, until golden brown.  Let rest for 5 minutes before serving.


   Make plenty, because these hand pies will disappear quickly.  


   Baked hand pies can be cooled and then frozen, and reheated in the microwave.
  To bake the frozen unbaked pies, simple place the desired number of hand pies on a prepared baking sheet, as directed above, brush with the egg wash and bake as directed above, adding about 5 minutes more to the baking time.
  For a great party appetizer, try cutting 3" circles and using about a Tbs of the filling, and continue as directed!

Saturday, April 7, 2012

The Ultimate Macaroni & Cheese!

Now we all love macaroni and cheese, and I've done a recipe or two on macaroni and cheese in the past, but this has to be, by far, my favorite recipe for homemade macaroni and cheese. I've been making it for years, and it's always a crowd pleaser!

I made this special treat for my birthday, since it fell on Good Friday this year, and being the good Catholic boy that I am, was barred from eating meat that day. I also added a special addition to this version, just for my birthday!

This is a dish that will appeal more towards the adult crowd, but kids should love it just as well, and the leftovers are even better!


Ingredients:


8 tablespoons (1 stick) unsalted butter plus more for dish
6 slices good white bread crusts removed, torn into 1/4- to 1/2-inch pieces
5 1/2 cups milk
1/2 cup all-purpose flour
2 teaspoons salt
1/4 teaspoon freshly grated nutmeg
1/4 teaspoon freshly ground black pepper
1/4 teaspoon cayenne pepper or to taste
4 1/2 cups grated sharp white cheddar cheese (about 18 ounces)(I used a mix of Vermont White, and extra sharp cheddar cheese)
2 cups grated Gruyere cheese (about 8 ounces)

1 pound elbow macaroni
8 oz cooked lobster meat (imitation lobster meat is perfectly fine too!), torn into chunks (optional)


Heat oven to 375 degrees. Butter a 3-quart casserole dish (or two 1.5-quart casserole dishes); set aside. Place bread in a medium bowl. In a small saucepan over medium heat, melt 2 tablespoons butter. Pour butter into bowl with bread, and toss. Set breadcrumbs aside.


In a medium saucepan set over medium heat, heat milk. Melt remaining 6 tablespoons butter in a high-sided skillet over medium heat.


When butter bubbles, add flour. Cook, whisking, 1 minute. While whisking, slowly pour in hot milk. Continue cooking, whisking constantly, until the mixture bubbles and becomes thick.

Remove pan from heat. Stir in salt, nutmeg, black pepper, cayenne pepper, 3 cups of the cheddar cheeses, and 1 1/2 cups Gruyere.


Set cheese sauce aside while you prepare the macaroni.


Fill a large saucepan with water; bring to a boil. Add macaroni; cook 2 to 3 minutes less than manufacturer's directions, until the outside of pasta is cooked and the inside is underdone. Transfer macaroni to a colander, rinse under cold running water, and drain well.


Stir macaroni into the reserved cheese sauce, and if using, gently fold in the lobster chunks. Because I would be serving this to my mother, as well, who suffers from a severe seafood allergy, I divided the macaroni and cheese in two halves, and only added the lobster to one half of the macaroni and cheese.


Pour mixture into prepared dish. I'm using two 1-1/2 qt baking dishes since I divided in half. Sprinkle remaining 1 1/2 cups cheddar cheeses, 1/2 cup Gruyere or 1/4 cup Pecorino Romano, and breadcrumbs over top.


Bake until browned on top, about 30 minutes. Transfer dish to a wire rack to cool 5 minutes.


Serve hot as a delicious lunch, first or main course or just whenever you're craving the ultimate in comfort food!


The leftovers are just as good and if you're looking for a unique twist on leftover macaroni and cheese, why not fry it!


Leftover macaroni and cheese, refrigerated at least overnight.


1 cup all-purpose flour
1 teaspoon salt
1 teaspoon pepper
1 teaspoon cayenne
1 egg beaten with 2 ounces water
1 cup panko bread crumbs
Oil for deep frying, preheated to 375 degrees


Cut refrigerated macaroni and cheese into slices or bite size pieces.
Season the flour with salt, pepper and cayenne.


Dredge each piece through the flour and gently tap off excess.


Dip in the egg wash and then coat with the bread crumbs.


Allow them to rest for 5 minutes so the crust can set. Very carefully drop into the oil and fry until golden brown.


Remove to a baking sheet fitted with a rack and rest for 2 minutes before serving.

Sunday, March 25, 2012

Garlic & Cheese Chicken Roll-Ups

Looking for new and different ways to prepare something for dinner, is something that I'm always working on. This recipe is an example of just the type of dish I look for. It's unique, yet simple, and can be made for any night of the week! The recipe comes from my good friend, Michelle, whom I met many, many years ago and share the love of our favorite band, Depeche Mode.

The ingredients are common and you probably have them all in your refrigerator and pantry right now. It also uses a new grocery store item called, "Philadelphia Cooking Creme", which I have been wanting to try, and I have to say, I'm quite impressed with the flavor and versatility of this new cooking ingredient. So why not try this tonight or impress that special dinner date!

6 boneless, skinless chicken breasts
1-1/2 cups Italian Seasoned Bread Crumbs
3/4 cup of freshly grated Parmesan Cheese
8 Tbls (1 stick) Unsalted Butter, melted
1 container (10 oz) Philadelphia Cooking Creme, Savory Garlic
1 bottle (16 oz) Kraft Zesty Italian Dressing
1/2 cup each, shredded Cheddar & Mozzarella Cheeses, mixed together

The first step is to place each chicken breast, one at a time, in between two pieces of plastic wrap and pound, with the flat side of a meat mallet, until each piece is evenly thin. Then you want to marinate the chicken in the zesty Italian dressing. Marinate for at least 4 hours or overnight. If you have a FoodSaver Vacuum Sealing System with the Marinator Accessory, like I have here, you can marinate the chicken in 30 minutes!

After the meat has been marinated, Preheat your oven to 350°. In one shallow dish, such as a pie tin, place the melted butter. In another shallow dish, the bread crumbs and Parmesan Cheese, mixed together. Place a piece of the chicken on a piece of parchment paper, and spread about 2 Tbls. of the cooking creme on the chicken, then about 1 Tbls. of the shredded cheese mixture. Starting at one end, roll up the chicken breast, tucking in the sides, to form a small "loaf" shape. Secure with toothpicks. Roll the chicken in the melted butter, then coat in the bread crumbs.


Place the chicken, in a 13" x 9" baking dish and drizzle with leftover melted butter, then sprinkle with any remaining bread crumbs. Bake for about 25 to 30 minutes, depending on how big or thick the chicken is, until done. A meat thermometer inserted through the center should read 165°. Sprinkle a small amount of the shredded cheese mixture on top of each chicken, then return to the oven for 5 more minutes or until the cheese is melted.


When the chicken is done, remove from the oven and allow to rest for about 5 to 10 minutes. Serve this with some creamy mashed potatoes or any vegetable of your choice, and a beautiful green salad. Enjoy!

Sunday, July 24, 2011

Layered Pizza Pasta Salad

Find yourself looking for another uniquely different dish? Want something out of the ordinary to take to the summer BBQ/Pot-Luck? Here's a pasta salad that's a twist on take-out and everyone is going to enjoy!

Layered Pizza Pasta Salad
1 box (16 oz) rotini pasta (I like using the tri-color rotini)
1 teaspoon Italian seasoning
1 medium red bell pepper, chopped
2 Roma (plum) tomatoes, chopped
1 large green bell pepper, chopped
1 package (3.5 oz) sliced pepperoni
1 container (8 oz) fresh mozzarella ciliegini (cheese balls), drained and halved
3 green onions, with tops, sliced
1/2 cup sliced pimento-stuffed green olives
1 cup zesty Italian dressing
1/4 cup of shredded Parmesan cheese

Cook and drain pasta as according to package instructions. Rinse with cold water to cool; drain.

In a 3 or 4 qt clear bowl (unfortunately, mine is not so clear, but it's all I had), layer 4 cups pasta, 1/2 teaspoon Italian season, then in order red bell pepper, tomatoes, green bell pepper, remaining pasta, remaining 1/2 teaspoon Italian seasoning, the pepperoni, mozzarella, green onions and olives.

Pour dressing over salad; sprinkle with Parmesan cheese and refrigerate 2 hours.

Stir just before serving!

Saturday, July 23, 2011

Radish Pasta

Here's another quick & easy summer time meal that's light and delicious! This recipe utilizes all the wonderful "French Breakfast Radishes" I grew in my garden this year. Makes a great lunch or light dinner. This dish also uses the radishes greens which are very good for you. If you can't find radishes with their greens attached, you can substitute a few handfuls of baby spinach.

All you need to put this together is:

Coarse salt and freshly ground pepper
3/4 pound of linguine or other long pasta
1/4 cup (1/2 stick) unsalted butter
2 garlic cloves, thinly sliced
1 large bunch of radishes, thinly sliced, greens rinsed well and roughly chopped.

In a large pot of boiling salted water, cook pasta according to package instructions. Reserve 1 cup pasta water; drain pasta and return to pot. Add 2 Tablespoons butter and toss until butter is melted; keep warm.

Meanwhile, in a large skillet, melt 1 Tablespoon butter over medium-high. Add garlic and radishes and cook, stirring occasionally, until radishes are crisp-tender, 3 minutes.

Add radish greens and cook until wilted. Season with salt and pepper.

Add to the pasta and stir to combine. Add enough of the reserved pasta water to create a light sauce that coats pasta. Now, if you'd really like to make this a meal, in that same skillet, melt another Tablespoon of butter and toss in 1 pound of peeled and deveined shrimp, season with salt and pepper, and cook, stirring occasionally, until opaque throughout, 4 minutes. Add shrimp to the pasta and toss.

To serve along with this, I sliced up a baguette into "crostini", toasted them, quickly, rubbed them with a cut clove of garlic, sprinkled some shredded smoked mozzarella cheese on them, put them back under a broiler just to melt the cheese.

Serve this along with the pasta and enjoy!

Friday, May 27, 2011

Tater-Tot Casseole

Always curious to try new recipes, a friend of mine shared this recipe for an interesting casserole and of course, I wanted to give it a test! Now this is generally not something I would make, given its high fat and caloric content, and use of pre-made and canned ingredients. It still peaked my interest to try it, at least once.

Although tater-tot casserole recipes are available by the dozen, online, and in community cookbooks all across America, this particular recipe utilizes Campbell's Golden Mushroom soup, which is new to me!

There are only 5 ingredients and this can be whipped in a pinch when those unexpected guests drop by!

1 lb ground beef (80/20), 1 large onion (sliced), 1 (2 lb) bag tater-tots, 2 cans of Campbell's Golden Mushroom soup and 1 lb shredded cheddar cheese.


Crumble the ground beef in a 13 x 9 baking dish, season with coarse salt & pepper

Add the sliced onion in an even single layer on top of the ground beef.

Add the entire bag of tater-tots, evenly across the top of the onions.

Now, pour both cans of soup on top of the tots, and spread evenly to the edges.

Sprinkle the shredded cheese evenly over the top.

Bake in a preheated 350 degree oven for about 45 minutes to an hour, until the cheese is melted, slightly browned and its bubbling nicely!!

Serve this up, garnished with a little fresh cilantro, and enjoy!

Guaranteed to be a hit at your next pot-luck or week-night meal!

Wednesday, April 13, 2011

Osso Bucu with Risotto Milanese

Osso Buco is an Italian specialty of veal shanks braised, usually in a white wine, and traditionally garnished with gremolata and served with a Risotto Milanese.

There are 2 types of Osso Buco. A modern version served with tomatoes, carrots, celery and onions and the original version which does not include the vegetables other than onion. The recipe I'm sharing here is the original version.

The name Ossobuco or Osso Buco is Italian
for "bone with a hole" (osso bone, buco hole), a reference to the marrow hole at the center of the cross-cut veal shank.


This recipe comes from the book "Lucinda's Rustic Italian Kitchen" by Lucinda Scala Quinn, and was featured on her television show "Mad Hungry".

Recently celebrating my 41st birthday, I wanted to make this as a special birthday dinner for myself.

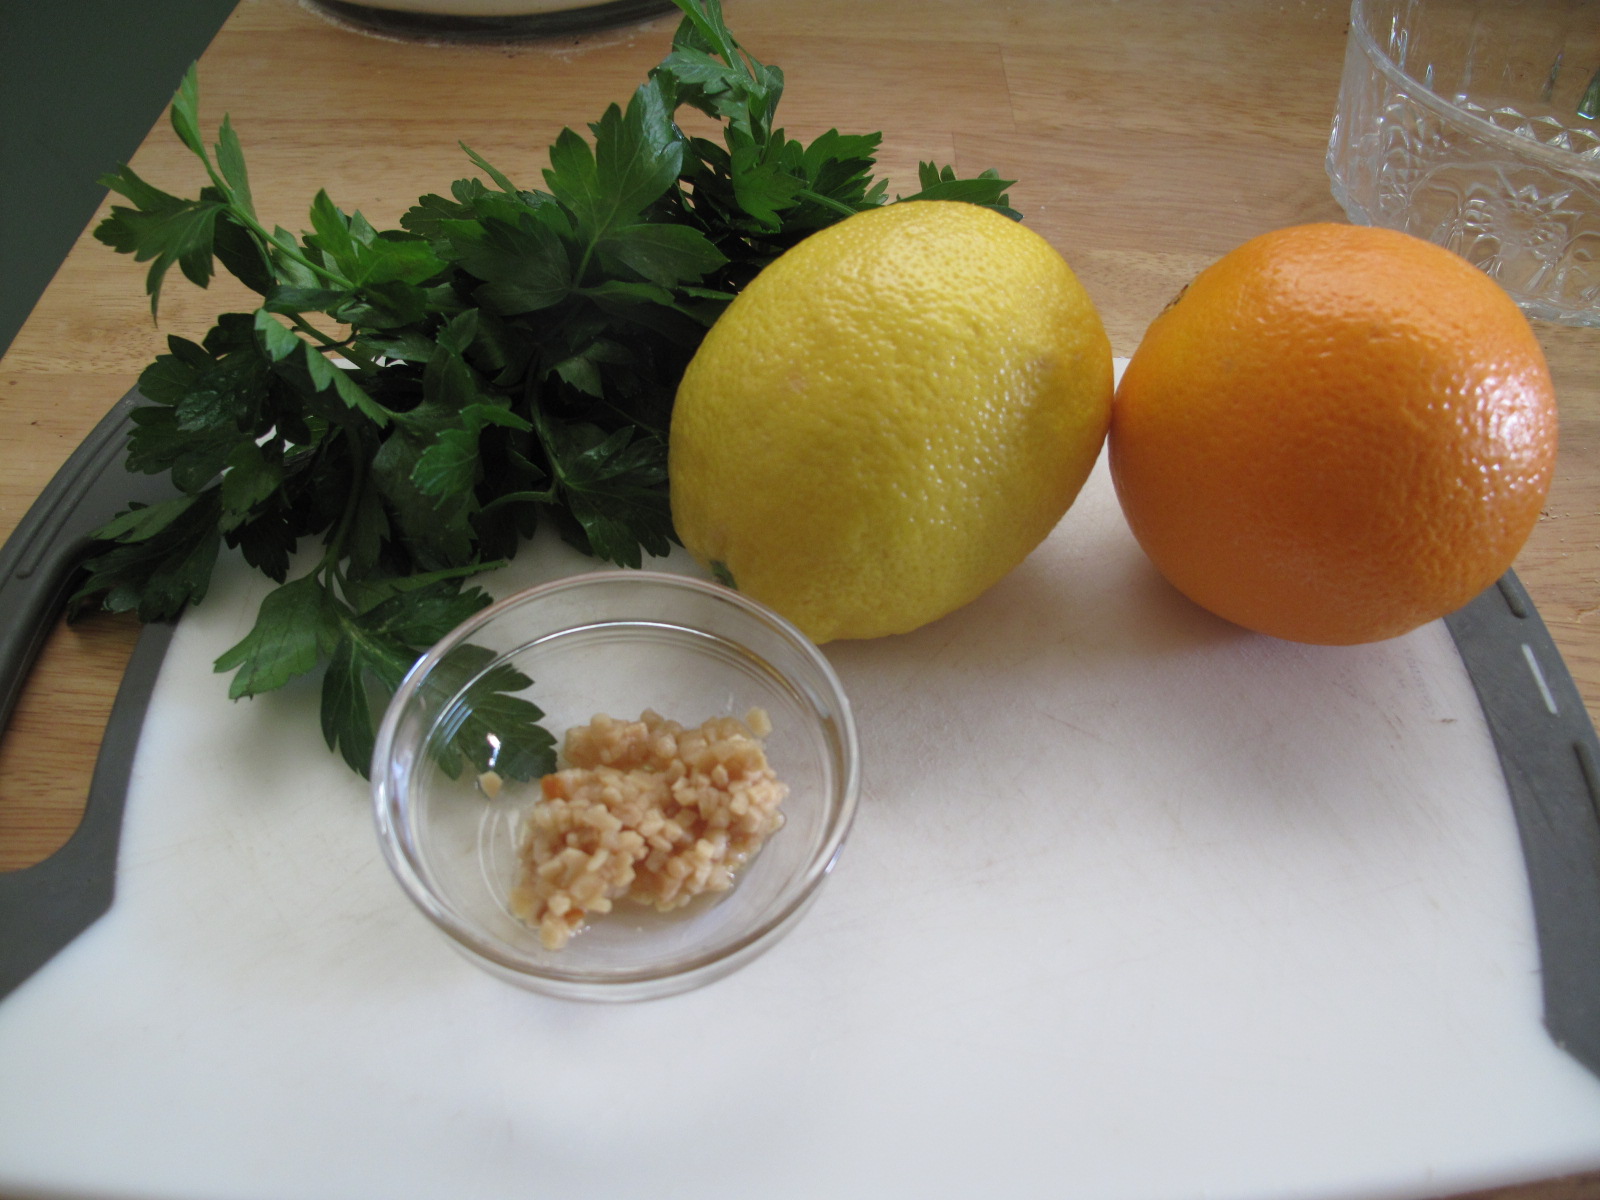
First step I did was to make the gremolata which is a simple garnish to sprinkle on top of the finished dish.

For this, you combine 3 tablespoons of finely minced Italian Flat-leaf parsley, 1-1/2 tablespoons each of minced lemon and orange zest, (If you have a Microplane zester, this step is easily done just by "zesting" the fruit), and 3 cloves of garlic, minced. Combine this all in a small bowl and set aside.


The dish's primary ingredient, veal shank, is a common, relatively cheap and flavorful cut. Although tough, braising makes it tender. The cut traditionally used for this dish comes from the top of the thigh which has a higher proportion of meat to bone.
Now, when I decided to make this dish, I never realized how hard, almost impossible, it is to find veal shanks in my area. I live in one of the largest cities in Michigan, just outside of Detroit, and I looked for veal shanks in several butcher shops and high-end markets, I even checked out many of the large meat purveyors in Detroit's Eastern Market, including a few slaughter houses (I was sided by side with skinned cows hanging from meat hooks in giant walk-in coolers), and could not find veal shanks to save my life!
I was to the point where I was about to give up on making this dish, but I didn't. It took me a couple more days, but finally located veal shanks at a large produce market, less than 10 minutes from my house, go figure.

You'll need 6 shanks for this recipe. First lay them out and season them on both sides with coarse salt and freshly ground black pepper.

Next, lightly coat them, in a fine all-purpose flour such as "Wondra" flour, shake off the excess.

Heat a large heavy-bottom pan over high heat. Add 2 tablespoons of extra-virgin olive oil and 2 tablespoons unsalted butter to the pan and swirl them around. Add the shanks and cook for about 3 minutes per side.

Cook the shanks until they are nicely browned on both sides.

Add 2-1/2 cups of a good quality Italian white wine, such as Pinot Grigio and stir it occasionally to de-glaze and loosen the browned bits on the bottom of the pan. Reduce heat to medium-low, partially cover, and simmer for 30 minutes. Turn the meat and cook until tender, about 30-45 minutes more.

While the meat is cooking, make the Risotto Milanese. One of the unique ingredients in this risotto is saffron, which gives this an enticing fragrance. You only need 2 teaspoons of saffron threads for this recipe and remember, this is the worlds most expensive spice, so a little does go a long way!

Add the saffron to 5 cups of hot chicken stock, stirring to infuse. Set aside.

In a medium saucepan over medium-low heat, add 2 tablespoons of olive oil, heat until hot and add 1 small onion, finely diced, cook until soft and translucent, 8 to 10 minutes.
Next add 2 cups of Arborio rice and cook, stirring, until toasted and opaque, 3 to 4 minutes.

Add 1/3 cup dry white wine and cook, stirring until almost evaporated. Add 1 cup of the stock and cook, stirring, until almost all the liquid is absorbed. Continue cooking, adding 1 cup stock at a time and stirring until each addition as been absorbed before adding more stock. Continue process until rice is tender and creamy but still slightly al dente, about 17-20 minutes. You may not use all of the stock.

Stir in 3 tablespoons of unsalted butter and 1/2 cup of freshly grated Parmigiano-Reggiano cheese until well combined.

By now, the veal should be done, serve immediately with a little of the pan sauce and sprinkled with a bit of the gremolata, along with the risotto, sprinkled with a little more Parmigiano-Reggiano cheese. A wonderful Italian Sunday dinner!