Showing posts with label Desserts. Show all posts

Monday, July 8, 2013

Creamy Watermelon Squares

  Watermelon is a summer-time staple, and a treat that almost everyone enjoys.  Though not much is really done with it, other than wedging, cubing or balling it!   Sure, there's the fancy watermelon boats, but who wants to do all that work?

  I consider this simple dessert a "cousin" to the Lemon Square. Enjoy these after a meal, or make a couple batches for the next big BBQ!

Ingredients that you'll need for 12 bars:

1 package (11 oz) of vanilla wafers, crushed into fine crumbs
6 tablespoons unsalted butter, melted
5 cups watermelon juice (see note)
1/2 teas. lemon zest
1/2 cup freshly squeezed lemon juice
1/2 cup milk (whole or 2%)
1 oz (4 pkts) unflavored gelatin
Confectioners sugar or whipped cream, for garnish (optional)


1.  Preheat oven to 350°.  Spray a 13" x 9" baking pan with non-stick cooking spray, then line with a sheet of parchment paper leaving a 2" overhang on each of the long sides of the pan. Lightly spray parchment with cooking spray.
  In a bowl, combine the vanilla wafer crumbs, melted butter and 2 tablespoons of water.  Mix well and press mixture, evenly, onto the bottom of the prepared pan. Bake crust for 20 minutes until lightly browned. Remove from oven and cool completely on a wire rack.


  2.  In a large bowl, combine 3 cups of the watermelon juice, lemon zest, lemon juice and milk. Set this aside. 
  In a small pan, combine the remaining 2 cups of watermelon juice and sprinkle the gelatin over the juice. Allow to sit for 2 minutes to allow the gelatin to absorb or "bloom".  After the gelatin "blooms", gently heat the pan over low heat until the gelatin has completely melted and the liquid is smooth.  


3.  Combine the two watermelon juice mixtures, stir together well.  Gently pour over the prepared, cooled crust and place in the refrigerator for 3-4 hours or until firm.


   4.  To serve, remove from the refrigerator and slowly run a knife completely around the edge to loosen.  Gently and carefully remove from pan using the parchment paper overhang and place on a cutting board.  Cut into 12 bars.  
  If desired, you can lightly sprinkle the bars with confectioner's sugar or a dollop of whipped cream.  Enjoy!


Note:  To make watermelon juice, place cubes of watermelon in a blender or food processor and process until smooth.  Pour through a fine mesh strainer into a bowl.  I got 5 cups of juice from about 9 lbs of watermelon!
  
  For another tasty and unique way to enjoy watermelon, try this Watermelon Gazpacho!


Thursday, March 29, 2012

Three Amazing Cakes for ANY Occasion!

Company coming? Invited over to a get together and need a special dessert to bring? Anyone will enjoy one of these delicious cakes that are simple to whip up for any occasion!


Banana-Coconut Crumb Cake


This cake comes from Nick Malgieri's book, "BAKE!: Essential Techniques for Perfect Baking." It pairs too favorites from the tropics, banana and coconut.

Ingredients for one 9-inch cake:

1-1/4 cups all-purpose flour (spooned and leveled)
3/4 cup granulated sugar
1/2 teas baking powder
1/4 teas salt
8 Tbls (1 stick) unsalted butter, softened
2 large eggs, room temperature
1 large egg yolk, room temperature
1 teas pure vanilla extract
1 lb (about 3 medium) bananas, peeled and sliced about 1/2" thick
Coconut Crumb Topping (recipe follows)

1. Set oven rack in the middle of the oven and preheat to 350°. Butter a 9-inch spring form pan, line with a round of parchment paper, cut to fit. Butter the parchment paper, as well.

2. Combine the flour, sugar, baking powder, and salt in the bowl of an electric mixer fitted with the paddle attachment. Mix on lowest speed for 30 seconds

3. Add the butter, and continue mixing on the lowest speed until no visible pieces of butter remain. Stop the mixer and with a rubber spatula, scrape down the bowl and beater.

4. In a small bowl, whisk the eggs, yolk, and vanilla together. With the mixer on the lowest speed, add about 1/3 of this egg mixture. Beat for 1 minute on medium speed; stop and scrape the bowl and beater. Repeat this two more times, then beat for 2 minutes on medium speed.

5. Pour the batter into the prepared pan. Arrange the banana slices on top of the batter, leaving a clear 1/4" margin near the side of the pan. Evenly scatter on the crumb topping.

To make the crumb topping, in a bowl, stir together 1-1/4 cups all-purpose flour, 1/3 cup granulated sugar, 1/4 teas baking powder, 1/4 teas cinnamon, 1/8 teas salt. Then stir in 1/2 cup shredded, sweetened coconut. Using a rubber spatula, stir in 8 tbls (one stick) of melted unsalted butter. Let stand for a few minutes, then use your fingers to break mixture up into 1/4" to 1/2" crumbs.


6. Bake until the cake is well risen and deep golden and the point of a paring knife, inserted in the center of the cake comes out clean, about 50-60 minutes.


7. Cool the cake on a rack for 10 minutes. Remove the side ring of the pan and let the cake cool, on the pan base, completely.


8. Once the cake has cooled completely, slice and serve. This cake can be kept under a cake dome or wrapped in plastic wrap at room temperature or double wrap and freeze for longer storage. Defrost and bring to room temperature before serving.


Sweet Potato-Bourbon Bundt Cake


This next cake is one of my favorites! This cake comes from the book, "Bundt Classics" by Dorothy Dalquist, who with her husband created the Bundt cake pan:


"The Bundt Pan" - In 1950, the landmark pan was introduced, after the Minneapolis Chapter of the Hadassah Society asked Dave and Dotty to produce a kuglehof pan, similar to the one the society's president had received from her grandmother in Germany.


Dave produced the pan from cast aluminum for the Hadassah Society and a few for the Nordic Ware trademark, which he sold to department stores using the name, bund pan. (The word bund means a gathering-thus a bund cake, with its characteristic fluting, was a cake suitable for a gathering or party.) Nordic Ware created the pan and filed for a trademark to protect its creation, renaming the pan the Bundt pan.
Ella Helfrich, in 1966, used a Bundt pan for her winning recipe of Tunnel of Fudge Cake, in the 17th Pillsbury Bake-off. Following the contest, Pillsbury was overwhelmed with more than 200,000 requests from people that wanted to purchase a winning Bundt pan. In 1971, Pillsbury launched a line of Bundt cake mixes, licensing the name from Nordic Ware that continued the nationwide quest for Bundt pans.


Now, Nordic Ware markets its own line of Gourmet Bundt® Cake Mixes.
"Today, there are nearly 60 million Bundt pans in kitchen's across America," Nordic Ware President David (Dave & Dotty's son). said. "Almost a Bundt pan in every pantry." The Bundt pan has continued its growth in popularity. It has been a guest on TV cooking shows, featured in an array of magazines and also used by some of the world's famous bakers. It is likely the most popular baking mold in the world." -- Nordic Ware Website


The ingredients are not that uncommon, and most should be right in your kitchen!


1-1/2 cups firmly packed dark brown sugar
1/3 cup unsalted butter, softened, plus more for pan
2 large eggs
1 cup cooked sweet potato
1 teaspoon pure vanilla extract
2-3/4 cups all-purpose flour
3/4 cup milk
1/3 cup bourbon or apple juice
1 tablespoon baking powder
1 teaspoon pumpkin pie spice
3/4 teaspoon salt
Nonstick cooking spray with flour
3 tablespoons chopped pecans
Bourbon Syrup (recipe follows)


1. Preheat oven to 325°

2. In the bowl of an electric mixer fitted with the paddle attachment, mix together brown sugar, butter, and eggs until very light and fluffy. Add sweet potato and vanilla; beat to combine. Add flour, milk, bourbon, baking powder, pie spice, and salt; mix until just incorporated. Lightly spray a 10 or 12 cup Bundt pan with cooking spray. Sprinkle bottom and up sides of the pan with pecans. Pour in cake batter.


3. Bake until a toothpick inserted in the center of the cake comes out clean, 50 to 60 minutes. Let cool 10 minutes. Remove from pan; cool completely on wire rack.


While the cake cools, make the Bourbon Syrup: In a small saucepan, bring 1 cup of sugar and 1/2 cup water to a boil, cook 5 minutes. Add 1 Tbls unsalted butter, 1/2 teas pure vanilla extract, and 2 Tbls bourbon, cook until syrupy, about 5 minutes.


4. Brush cake with bourbon syrup. Serve cake slices with any remaining syrup.


The Ultimate Chocolate Cake


This next cake is sure to be every chocolate lovers absolute favorite! It's a sinfully delicious chocolate cake, covered in a fudgy chocolate frosting that is perfect for those special occasions or just to satisfy those "Chocoholics" in your life!


For best results, I do recommend using Valrhona Cocoa, but any good quality cocoa will do, just be sure to get the best quality you can find.


To make the cake you'll need:


1 cup Valrhona cocoa, plus more for dusting
3/4 cup strong coffee, boiling
1 cup milk, room temperature
2 3/4 cups cake flour (not self-rising)
1 teaspoon baking soda
1/2 teaspoon salt
1 1/2 cups (3 sticks) unsalted butter, room temperature, plus more for pan
2 1/2 cups sugar
1 tablespoon pure vanilla extract
4 large eggs, room temperature


1. Place rack in middle of the oven. Preheat oven to 350°. Butter two 8-by-2-inch round cake pans. Line with parchment paper. Butter the parchment, and dust with cocoa powder; tap out excess. Sift cocoa; whisk in boiling coffee and milk. Let cool. Sift together cake flour, baking soda, and salt. Set aside.


2. Using a rubber spatula, mix the butter in a large bowl until light and fluffy, about 2 minutes. Gradually add sugar and vanilla. Add the eggs one at a time, stirring well after each addition. Pour in the cooled cocoa mixture. Mix until fully incorporated.

3. Add the sifted dry ingredients to the chocolate mixture, stirring until just combined. Pour the batter into the prepared pans (about 4 cups in each pan). Bake for 20 minutes, rotate the pans, and bake for an additional 15 minutes, until a cake tester comes out clean when inserted into the center.


4. Remove the cakes from the oven, and allow to cool in pans for 15 minutes on a cooling rack. Carefully run a small offset spatula around the edge of the cakes to loosen them from the pan. Remove cakes from pans, and invert onto a wire rack. Let cool completely, about 1 hour.


To make the fudgy chocolate frosting for the cake, you'll need the following:

3-1/2 cups confectioners' sugar
1 cup Valrhona cocoa powder
12 Tbls (1-1/2 sticks) unsalted butter, room temperature
1/2 cup milk, room temperature
2 teas. pure vanilla extract.

In a small bowl, sift together the confectioners' sugar and cocoa powder. Add butter, milk, and vanilla; stir until smooth and free of lumps.


To assemble the cake, using a serrated knife, level the top surface of each cake layer. Place four strips of parchment paper around the perimeter of the cake stand. Spread with 3/4 cup of frosting. Top with the remaining layer, bottom side up. Using a swirling motion, cover the outside of cake with the remaining frosting. Remove parchment-paper strips.


This cake can be kept, under a cake dome, at room temperature, for up to 5 days. To transport this cake, it's best to use a cake carrier, and secure the cake by insterting a wooden skewer down the center of the cake to prevent the cake layers from shifting. You can snip off the top of the skewer so it's not seen.

Monday, May 30, 2011

Coconut Bonbons

Summer is officially upon us and always looking for sweet and delicious treats to enjoy during the summer, I came upon this recipe I saw many years ago and have yet to try, until now!

The name "bonbon" is French, meaning "good-good" and refers to any of several types of sweets, especially small candies enrobed in chocolate. The first reports of bonbons come from the 17th century, when they were made at the French royal court.

This particular version, is made using coconut sorbet, shredded coconut and almonds, and are perfect little treats to enjoy outside on a hot summer day!

Very simple to make, all you need are a few ingredients and these can be ready in about an hour! Get the complete recipe here: Coconut Bonbons
Link
You'll need some Nabisco Famous Chocolate Wafer Cookies, coconut sorbet, shredded unsweetened coconut, whole almonds, some semi-sweet or bittersweet chocolate and little vegetable shortening.

On a wire rack, placed onto a sheet pan, place the wafers, top side down, spaced evenly. Add some shredded coconut in the center of each wafer, top with a small scoop of sorbet, and an almond on each. Put the pan in the freezer for at least 20 minutes.

In a heat-proof bowl, set over a pan of barely simmering water, melt the chocolate and shortening until nice and smooth. Remove from heat and cool slightly.


Remove the baking pan from freezer and ladle a good amount of the melted chocolate over the bonbons, completely covering the entire bonbon. Remember to work fast as the warm chocolate will start to melt the sorbet slightly. Return the baking pan to the freezer for at least 30 minutes or overnight, if not serving right away. Enjoy!!


Monday, March 21, 2011

Hi-Hat Cupcakes. This isn't your usual cupcake!

Who doesn't love a cupcake? I know I do, and I'm sure you do too. When you're in the mood for a decadent taste of cake, cupcakes are easy and small enough to satisfy that sinful craving without having to bake up an entire cake - not like that's a bad thing either! Even my chocolate allergy couldn't keep me from enjoying one of these devilishly delicious creatures!

These unique cupcakes were featured on the new "how-to" show by Martha Stewart called "Martha Bakes" (Mondays, 11:00 AM est, on
Hallmark Channel).

These rich devil's food cupcakes are topped with a creamy snow-white frosting, then dipped in a delicious semi-sweet chocolate coating. You can find the recipe here, "Hi-Hat Cupcakes". This makes 3 dozen cupcakes and you'll need to make that many because they're going to disappear very quickly!!
The recipe can also be found in Martha Stewart's Cupcakes Book

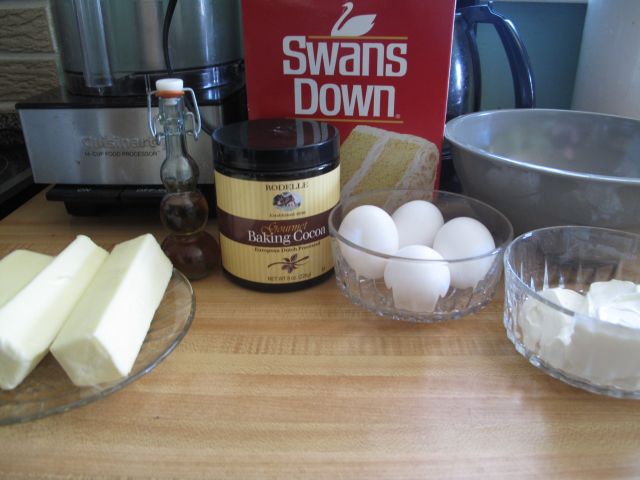
First, you'll make the cake batter. Remember to gather all your ingredients and pre-measure them out. It makes the recipe move along more smoothly! Also, you'll want to use the very best chocolate/cocoa you can find. Don't skimp on this because you'll definitely notice the difference. Go for Valrhona or Ghirardelli, which can be found in most supermarkets and gourmet food shops. Even Meijer now offers a really good dutch-processed baking cocoa, called Rodelle Baking Cocoa.

The cake recipe is quite simple and unique to most cake recipes as it doesn't include milk or buttermilk, like most cake recipes call for. Instead it uses sour cream. Start out by whisking together the cocoa with hot water until it's smooth, then whisk in the sour cream, and let cool. In a separate medium bowl, sift together flour, baking soda, and salt; set aside.

In the bowl of an electric mixer fitted with the paddle attachment, cream the butter and sugar on medium speed until light a fluffy. Add eggs, one at a time, scraping down the bowl as needed. Beat in vanilla.

With the mixer on low speed, add flour mixture, alternating with the cocoa mixture. Beat until combined.

Fill lined cupcake pans, about half full and bake until a tester comes out clean. Let cool completely. Now the key here is to have the cupcakes bake to just come up to the top of the cupcake liner, not bake over. Of course, as usual, I was a tad bit generous with the batter, but that's ok!

Now on to making that creamy frosting! This is very simple and you only need a few ingredients, egg whites (at room temperature), sugar, water, cream of tartar and vanilla.

In the bowl of your electric mixer, whisk together sugar, egg whites, water, and cream of tartar until foamy.

Set the bowl on top of a pan of barely simmering water and whisk until the sugar is dissolved and the mixture is warm to the touch.

Move the bowl to your mixer fitted with the whisk attachment, and beat on high speed until frosting forms stiff peaks. Add vanilla and beat until combined.

Transfer the frosting to two large pastry bags fitted with either a large (1/2-inch) plain or open star tip. Leaving a 1/8-inch border on each cupcake, pipe a spiral of frosting into a 2-inch-high cone shape. You want to work fast on this part because if it is warm in the kitchen, the frosting will soften quickly and start to "fall" as you can see on a couple of the cupcakes in the bottom left of the photo. Transfer the cupcakes to a baking sheet, and refrigerate while preparing the chocolate coating.

To make the chocolate coating, simple take 24 ounces of chopped semi-sweet chocolate (again, the very best you can get), and 6 tablespoons of safflower oil, placed in a medium sized heat-proof bowl. This chocolate coating is also excellent for dipping strawberries, pretzels, ice cream cones, or anything else you feel like coating in chocolate!!

Set the bowl over a pan of barely simmering water, and stir until melted and smooth.

Transfer the melted chocolate to a small, deep, bowl or container. Let cool for about 15 minutes. Now, again, working quickly, hold each cupcake by its bottom, dip in the chocolate to coat all of the white frosting, allowing excess to drip off. Transfer to a baking sheet. Now the actual recipe states to let the cupcakes stand at room temperature for 15 minutes before refrigerating them, but because of the white frosting softening rather quickly, I skipped this step.

Place the cupcakes on a serving platter, and refrigerate for 30 minutes to let the coating set. Cover and refrigerate for 2 hours more and serve cold! Cupcakes can be refrigerated up to 3 days, but I doubt they'll last that long!!

Sunday, October 31, 2010

Pumpkin Whoopie Pies - Sinfully Delicious!

This Halloween I wanted to make up a special treat for my nephew and niece and their friends when they embarked on this special night of tricking and treating!

These Pumpkin Whoopie Pies are decadently delicious and can be enjoyed all throughout the Autumnal season, not just on Halloween!

A whoopie pie is a baked good made of two round chocolate, cake-like, cookies
with a sweet, creamy frosting sandwiched between them. While considered a New England phenomenon and a Pennsylvania Amish tradition, they are increasingly sold throughout the United States. According to food historians, Amish women would bake these and put them in farmers' lunchboxes. When the farmers would find these treats in their lunch, they would shout "Whoopie!"

You can get this simple recipe here: Pumpkin Whoopie Pies

The recipe is actually for a "Mini" version, but I made a larger, more regular sized version by using 2 Tablespoons of batter for each cookie instead of 2 teaspoons. The baking times remain the same. I also doubled the batch of filling.

First step is to get your oven preheating to 375° and then sift the flour, cocoa, baking soda and salt together in a bowl.

In the bowl of an electric mixer fitted with the paddle attachment, cream together butter, shortening, granulated sugar & dark brown sugar until smooth. Then you'll add one egg and continue to mix until pale and fluffy.

Mix in about half of the flour mixture, then a cup of milk, some pure vanilla extract and then the remaining flour mixture.

Drop batter, 2" apart, onto baking sheets lined with parchment or non-stick baking mats. Bake for 12-14 minutes, rotating the sheet pans halfway through baking, until the cookies are done.

Transfer the cookies to cooling racks and cool completely.


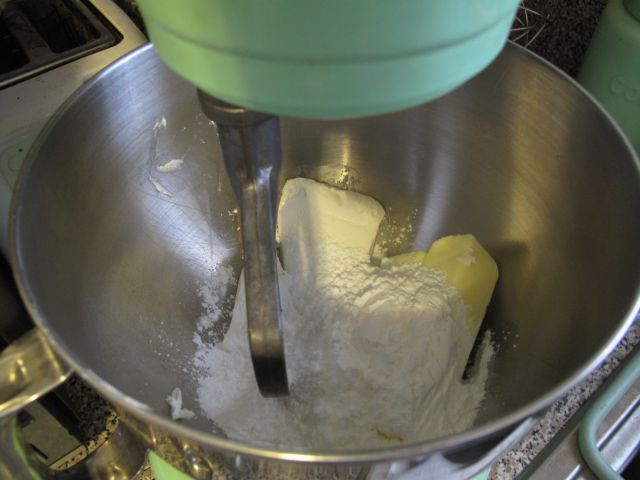
To prepare the luscious pumpkin filling, in the bowl of an electric mixer, fitted with paddle attachment, whip together cream cheese, unsalted butter and confectioners' sugar, on medium speed, until smooth.

Add fresh pure pumpkin, a little cinnamon and nutmeg and continue to whip until smooth, scraping down the bowl as necessary.

Pipe or spoon the filling on the flat sides of half the cookies. Sandwich with the remaining cookies, flat side down. Enjoy one of these now because there won't be any of them left soon after you make them!!

Thursday, September 9, 2010

Mario's Weekend Cooking Challange: Blackberry-Blueberry Crumble

Mario's Weekend Cooking Challenge is a Facebook Group for people to get together, once a month and cook the same recipe, compare notes and discuss outcomes. It is put together by Mario Bosquez host of "Living Today" on Martha Stewart Living Radio, Sirius 112 & XM 157

This months challenge was a "sweet" one! Blackberry Blueberry Crumble. A delicious mix of some of summer's tastiest offerings! The fast and simple recipe was provided by Chef Kate Goodyear and can be obtained here: Blackberry-Blueberry Crumble

First, you want to combine your berries, with some brown sugar, cornstarch and lemon juice.

Place your berry mixture into a 9 x 13 baking dish.

Mix together your topping ingredients of flour, oats, white & brown sugar, ground ginger, salt and butter. Mix it, by hand (make sure you wash your hands first!), to obtain medium to large "crumbles".

Spread the topping evenly over the berries.

Bake at 350° for about 40-50 minutes until it's golden brown & bubbly! The scent of this baking is heavenly!

Serve this warm or at room temperature with a generous scoop of buttermilk or vanilla ice cream!

This treat couldn't be easier to prepare and will be loved by all! You can also substitute other berries, as well as stone fruits like peaches and plums!